Thursday, January 30, 2014

beauty tips: perfecting the at-home manicure


We've been getting manicures at the salon for years, but because of our hectic schedules (and our fears of the dreaded post-manicure polish chip!) we decided to try our hand at mastering the perfect at-home mani! Here are our tips to help you get salon-quality results at home.


What you'll need: Your favorite polish, a base & top coat (we used Chanel Polish in Bel-Argus, Deborah Lippmann "Fast Girls" Base Coat, Deborah Lippmann "Fast Girls" Top Coat), orangewood sticks, a nail file, a nail buffer, hand soap, a small bowl, warm water, hand cream, nail polish remover, cotton pads, and a nail clipper.

Step 1: Clip your nails to a desired length if needed, then file and buff your nails.


Step 2: In a small bowl filled with warm water and a squirt of gentle hand soap (nothing antibacterial, it's too harsh on hands), soak your nails for a few minutes to soften your cuticles.

Step 3: Remove hands from water and use your orangewood stick to gently press your cuticles back while your cuticles are still soft. Then take your favorite hand cream and massage it onto your hands.

Step 4: Take a cotton pad with a little polish remover and rub each nail to create a clean slate for your manicure.


Step 5: Carefully apply a thin coat of base coat to your nails.


Step 6: Let the base coat dry for about a minute, then apply your first, thin coat of nail polish. The trick is to do three brush strokes per nail: start with one line straight down the middle of the nail, getting as close to the base of the nail as possible (try your best not to touch the cuticle with the nail polish), then slowly polish each side. The important thing is to go slow and take your time. If any polish gets on your skin, do not touch it, we will get this off afterwards.

After this first coat, the nails do not have to look perfect - the polish should not be fully opaque. Try to keep it in the lines, but make sure that the first coat is not too thick.


Step 7: For the second coat, use the same technique as the first coat of polish - paint the nails in three sections. This coat should be thin as well, but if you aren't using a sheer polish, the nails should be fully opaque after the second coat. If the polish is not opaque, do one more thin coat if you feel this is necessary.

Step 8: Apply a thin layer of your top coat on the nail, making sure to get across the tip of the nail as well. The top coat will act as both a top coat to the nails and as a polish remover for any color that got on your skin or wherever polish is not desired.


Step 9: Wherever you got polish on the skin, completely cover the area with the top coat. Using the tip of orangewood stick, lightly press and drag the stick towards the tip of your finger, and voilà, your nails should be all cleaned up and finished!

Make sure you let your nails air dry for a good thirty minutes before doing anything that could possibly cause a smudge!

This post originally appeared on Daily Makeover! Check it out here


Pin It Now!

Wednesday, January 15, 2014

d.i.y. monogrammed laptop case


Continuing on in our pursuit of prettiness, I set my sights on my laptop, which was looking a little bare. I decided to glam it up a bit with some of our favorite things: monograms, pictures of some of our favorite people, and glitter! Here's a super simple guide to make one yourself:


What You'll Need: A clear snap-on laptop case, a monogram decal, Duck Glitter Tape, a picture collage (use actual pictures, or make one on your computer and print one out - measure your laptop screen beforehand and keep the collage within those dimensions), tape, and scissors


Step 1: Tape together your picture collage if needed.

Step 2: Stick the monogram decal to the center of your picture collage
(center it before sticking it to ensure proper placement!)

Step 3: Using the glitter tape, place the picture collage picture-side down inside the laptop case. Tape around the border of the picture collage, letting the tape curl under the rounded edges of the laptop case, and trimming it to fit where needed.

That's it! Snap the case on and enjoy!


Pin It Now!

Saturday, August 3, 2013

the want list


j.crew collection cashmere boyfriend sweater (available here), chanel le vernis in bel-argus (available here), saint laurent leather pumps (available here) hermes balcons du guadalquivir printed bracelet (available here), banana republic lightweight scarf (available here), gucci bright bit patent leather shoulder bag (available here)

From navy to dark, from Egyptian to baby, the are countless, beautiful shades of blue. Here are a few of my favorite & timeless blue pieces that can be worn year round, dressed both up & down. I'm currently sporting Chanel's Bel-Argus on my nails, a gorgeous metallic which appears to turn different hues of blue in different lighting. How are you wearing blue this summer?


Pin It Now!

Monday, July 8, 2013

blue note


I've always loved the look of blue mascara. I remember that when I was little I would steal Jilly's Maybelline Great Lash Mascara in Royal Blue and use it all the time when she didn't know...(confession: I still have that tube of mascara. It's probably at least ten years old...) It wasn't until I saw the photos of Cara Delevingne backstage at the Stella McCartney show that I realized just how wearable and striking the look is!


The second I saw this Chanel mascara, I knew I had to have it. I couldn't wait to try it out on my favorite canvas...Jilly! To even out Jilly's skin, I applied Giorgio Armani Maestro Foundation on her face. Using YSL Touche Éclat, I highlighted Jilly's cheekbones and brightened the skin under her eyes. I curled the lashes using my favorite Shu Uemura Eyelash Curler. When using colored mascara, it's important to prep the lashes with a white primer to make sure the color really pops! I prepped Jilly's lashes with my personal fave, Diorshow Maximizer Primer! Once the lashes are fully coated with primer, you then begin to apply the mascara! I went very heavy on the mascara to ensure that it would really pop!


products used: chanel inimitable waterproof mascara in 57 blue note (available here), giorgio armani maestro foundation in shade 2 (available here), ysl touche éclat in 1.5 (available here), shu uemura eyelash curler (available here), dior diorshow maximixing primer (available here)

What do you think of the blue mascara trend? would you ever try it?


Pin It Now!

Friday, April 19, 2013

the want list: keep it simple


dl1961 amanda skinny jeans (available here), diane von furstenberg iPhone case (available here), jennifer zeuner skinny diamond snake necklace (available here), j. crew vintage t-shirt (available here), band of outsiders jacket (available here), 3.1 phillip lim pashli satchel (available here), french sole two-tone loafer (available here), warby parker downing sunglasses (available here), jacquie aiche mini bar ring (available here), tom ford nail lacquer in indian pink (available here)

With finals just around the corner, easy, throw-on-and-go ensembles are just what we need! You can never go wrong with a simple tee and a good pair of skinnies (and the slightly-distressed look of these DL1961 jeans is perfection!).


Pin It Now!

Monday, March 25, 2013

peeps cupcakes


Peeps are hands down one of our favorite things about Spring. A box never lasts more than one day in our house! This year we decided to get a little creative with them before devouring them, so I baked up these pretty little Spring-ready cupcakes to house them for the time being (there's no way these are lasting until Easter!). Here's what you'll need to bake them yourself:


And a huge congrats to the winner of our Nico New York Giveaway, Vittoria! :)


Pin It Now!

Thursday, March 7, 2013

icy cat eye


As much as I love a bold lip, there's nothing like an accentuated eye look. Inspired by the cold winter weather, I went with a cat-eye look using icy, cool colors.

I started with prepping the skin with my three favorite primers - Benefit Stay Don't Stray Primer is for both under the eyes and the eye lid, ensuring that both under-eye concealer and eye shadow stay put, Benefit POREfessional Primer, which seemingly makes pores disappear, is perfect for the t-zone area, and I use Smashbox Photo Finish Primer for the rest of my face. All three primers work together to create a seamless canvas for the rest of the makeup.


Using the Sephora Collection Pro Foundation Brush #47, I blended a sheer layer of YSL Touche Eclat Foundation all over my face for a flawless complexion. Using the brand's Touche Eclat highlighter, I highlighted under my eyes, my cheekbones and under my eyebrows. I contoured under my cheekbones with Estee Lauder Bronze Goddess Soft Shimmer Bronzer, blending to ensure that there were no harsh lines.


For the eyes, I started by blending Chanel Illusion D'Ombre in Epatant, a gorgeous silver shimmer with hunter green undertones, all over my eyes just a bit above the crease of my eyes. Then, using Chanel Illusion D'Ombre in Illusiore, a steel-like shimmer with plum undertones, I applied the eyeshadow in the crease and along the lash line-then blending out towards the eyebrow in a cat-eye way. Then, using the Urban Decay Naked 2 Palette, I took the white silvery shimmer, Verve, and blended it from the inner corner to the middle of the eye. Also using Verve, I went from the inner corners of the eye down to the middle of the bottom lid as well. Using the darkest color from Naked 2, Blackout, I created a subtle smokey cat-eye by creating a horozontal V going from the crease to the upper lash line. Using MAC Pro Eyeliner, I lined both the inner and outer corners of my eye, as well as the bottom lid. Finishing the look with three heavy coats of YSL Faux Cils Shocking Mascara and setting the makeup with Urban Decay All Nighter Makeup Setting Spray to ensure that the look would last, I was ready to go!


Products Used:
Benefit Cosmetics Stay Don't Stray Primer (available here), Smashbox Photo Finish Primer (available here), Benefit Cosmetics POREfessional Primer (available here), Sephora Collection Pro Foundation Brush #47 (available here), Yves Saint Laurent Touche Eclat Foundation (available here), Yves Saint Laurent Touche Eclat Highlighter (available here), Urban Decay Naked 2 Palette (available here), Chanel Illusion D'ombre Eyeshadow in Epatant & Illusoire (available here) , Chanel Nail Polish in Dragon (available here), MAC Pro Eyeliner (available here), Yves Saint Laurent Faux Cils Shocking Mascara (available here), Estee Lauder Bronze Goddess Soft Shimmer Bronzer (available here), Yves Saint Laurent Rouge Pur Couture #24 (available here), Urban Decay All Nighter Spray (available here)


What is your favorite smokey eye look? Do you like to keep it dark and dramatic or lighten up a bit?


Pin It Now!

Tuesday, February 26, 2013

the want list: cool in cashmere


j.crew collection cashmere colorblock sweater (on sale - available here), j brand 901 low-rise legging style jeans (available here), dannijo symson iPhone 5 case (available here), hermes bangle (similar styles here and here), prada clutch (similar), rose pierre banyan tree bark cigar ring (available here), tom ford beauty lip color in scarlet rouge (available here), christian louboutin pigalle spike pumps (available here), tom ford christophe sunglasses (available here)


Being that winter is most definitely still in effect, cashmere sweaters are still a necessity! A little color blocking action paired with edgy black accessories and a statement lip are bound to warm things up!


Pin It Now!

Thursday, January 24, 2013

tom ford: black orchid


Tom Ford is one of my all time favorite designers - from his iconic work with Gucci & Yves Saint Laurent to branching out with his own luxury line, it appears that anything Tom Ford touches turns to gold. When it was announced that Tom Ford was releasing a cosmetics line, I was ecstatic! Before the line made its debut, I assumed that the high quality of these luxury cosmetic products would be reflected in the price. It turned out that I was correct.

I lusted after Tom Ford cosmetics for quite some time, and looking at photos online of what the brand had to offer did nothing to stifle my want for these products, but it fueled my desire to purchase them. At the beginning of 2013, I decided that any purchase made in the new year would not be on impulse. I would only purchase things that I truly needed. I took the plunge, deciding that Tom Ford Black Orchid Lipstick was EXACTLY what I needed.


I prepped Jilly's skin with her favorite moisturizer, and went on to use Make Up Forever HD Perfecting Primer. Once the primer set in, I blended a tad of Yves Saint Laurent Touche Eclat Illuminating Foundation onto her skin. Contouring her cheekbones with a bit of NARS bronzer in Laguna gave her a bit of color. I lined her eyes with Blackout, the darkest color in Urban Decay's NAKED 2 Palette.


The lipstick, which can be applied lightly for a sheer look or heavier for a more standout look, is a dark plum with shimmer that is subtle, almost undetectable on the lips. I applied it with Urban Decay's Good Karma lip brush for a perfectly even look. When wearing a lipstick as gorgeous as Tom Ford Black Orchid, you will want the lip to be the main focus, so keep jewelry and accessories to a minimum!

I can honestly say that Tom Ford's Black Orchid Lipstick has exceeded any expectation that I had. This will most definitely be the first of many Tom Ford Beauty purchases!


Pin It Now!

Friday, December 21, 2012

'tis the season: holiday peacock eyes


One of my favorite makeup looks year round would be the ever popular smokey eye, so I figured what better way to update it than with some holiday colors, thus turning from a smokey eye to a peacock eye! I don't know about you, but a rich dark emerald green is what I consider one of the most beautiful colors out there. I decided to pair the green with a gorgeous gold for a dramatic and reflective contrast.


The peacock eye is associated with the brilliant Pat McGrath for Roberto Cavalli's Fall 2012 show, who used as much as four bright and contrasting colors on the eye. While nothing less than stunning on the runway, for a more subtle but equally gorgeous look, pick an unexpected pair of shimmery dark and light colors.


I prepped Jilly's gorgeous skin with her favorite moisturizer and then Make Up Forever HD Primer. After, I applied a light layer of Yves Saint Laurent Le Teint Touche Eclat foundation. I then defined her already perfect cheekbones with a little bit of Estée Lauder Bronze Goddess bronzer.


When you work with any eyeshadow, you're going to want to use a primer to ensure not only that it wont move, but that the color will be at its purest saturation. The eye primer I used on Jilly was Benefit Stay Don't Stray primer. After, I applied the gorgeous gold, Half Baked, from the Urban Decay Naked palate from the inner corners to the middle of her eye. I then applied NARS Night Porter eyeshadow, a gorgeous dark emerald green, from the middle of her eye out-making sure to blend!


I then used my personal favorite mascara, Yves Saint Laurent Shocking Mascara in black, and a quick swipe of my favorite nude lip, YSL Rouge Pur Couture in 24 Blonde Ingenu, and all done! A perfect played up eye look for the holidays!


Pin It Now!

Tuesday, December 11, 2012

'tis the season: red lip & glowing skin


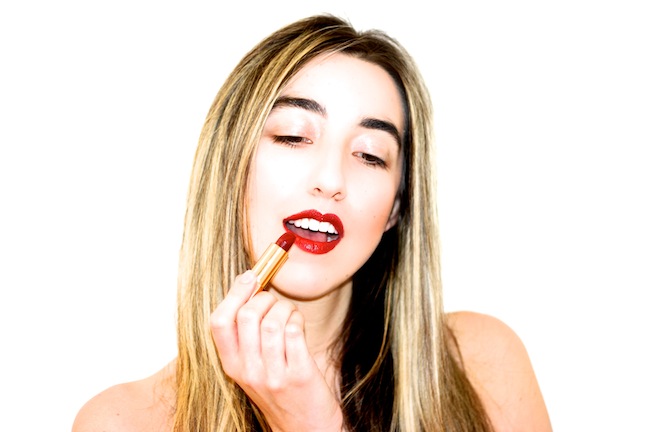
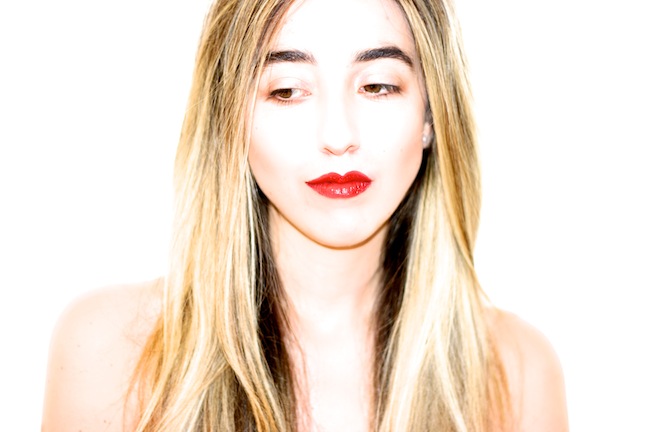
I don't know about you, but every year after Thanksgiving, my makeup look completely changes up! I've been known to rock a red lip, but what better time of year to do it than around the holidays? To me, winter is the perfect time of year to rock your reddest reds on your lips-especially since the cold weather will ensure that your perfect pout wont melt or smudge!


products used: Yves Saint Laurent Le Teint Touche Eclat, Yves Saint Laurent Touche Eclat Radiant Highlighter, Chanel Rouge Coco Hydrating Lip Color #19 Gabrielle (similar), Chanel Rouge Allure #71 Fatale, Estée Lauder Bronze Goddess Soft Shimmer Bronzer


To get this holiday look, apply a light layer of sheer to medium illuminating foundation all over the face. Then, dot highlighter under the eyes, on the cheekbones under the eyebrows and the cupid's bow. Fill in your eyebrows with pencil for some added definition (although with Jilly's envious brows, none were needed).


Contour just under your cheekbones with a bit of bronzer-but remember to blend! No mascara was used on Jilly, but if you ladies are one of those who refuse to leave the house without mascara on, go for one coat of your favorite lengthening mascara (I like this one or this one). Lastly, apply your favorite red red a lip brush to ensure that the line of your red lips are perfect! I mixed two Chanel colors for Jilly to make what I believe is her perfect red!


What is your go-to beauty look? Do you feel like you switch things up during the winter?


This post has been submitted to the IFB project


Pin It Now!